


On this page
A 20 vs 30 vs 40 inch light bar decision should start with the vehicle’s usable mounting span, not the empty opening’s advertised width: the housing, end caps, brackets and wiring all need room. Measure the actual mounting points, compare the product’s complete outside dimensions, then check beam use and electrical requirements before ordering.
Prepared by the SAEC Lighting Engineering Team. This guide explains a general fitment method; it does not confirm compatibility with a particular year, make, model, trim or aftermarket bumper. Last updated October 11, 2026.


What does a light bar’s size measure?
The size in a product name is a nominal length, not a universal vehicle-fitment specification. A 20 inch bar can have a housing length, overall length and bracket-to-bracket width that differ from one design to another. Check the manufacturer’s dimension drawing for all three measurements before choosing a mounting location.
Use these terms consistently:
| Measurement | What to compare | Why it matters |
|---|---|---|
| Housing length | Outside edge of the lamp body | Determines whether the light fits the visible opening |
| Overall width | Widest point including end caps or side hardware | Prevents contact with bumper, grille or bodywork |
| Mounting span | Outside-to-outside width of the brackets in the installed position | Determines whether the existing slots or supports can accept the brackets |
| Depth and height | Full profile including rear heat sink and mounting foot | Protects clearance behind the bumper and around shutters, sensors or winch hardware |
If the product page gives only a nominal length, request a dimensioned drawing before drilling or ordering. Vehicle openings can look wider than the safe mounting area behind the fascia.
How to measure your mounting space
Use a tape measure and a straightedge to record the real mounting area. Remove only covers or trim that the vehicle maker says can be removed safely; do not cut structural parts or cover sensors to create room.
- Identify the mounting points. Measure between the rigid supports where the brackets will attach, not between the outer edges of decorative trim.
- Record the narrowest clear width. Check the opening at the bracket height and at the lamp-body height. Grilles, bumper ribs and recovery points can narrow the space at different depths.
- Check depth and vertical clearance. Account for the rear heat sink, connector, cable bend, bracket travel and any moving grille shutters.
- Compare complete dimensions. Leave enough clearance that the bar and brackets cannot rub against painted panels or adjacent equipment as the vehicle flexes.
- Verify the intended load path. The brackets should fasten to a rigid vehicle or accessory structure. A plastic grille is not a structural support unless the vehicle or bumper maker specifically designed it for that use.
Do not treat the 20 vs 30 vs 40 inch light bar label as a fitment guarantee. This 20 vs 30 vs 40 inch light bar comparison is a starting point for measuring, not a substitute for a product drawing. A nominally shorter product can still be too deep or have brackets too wide for a tight opening.
How do 20, 30 and 40 inch bars compare?
For 20 vs 30 vs 40 inch light bar shopping, size is a packaging trade-off, not a direct brightness scale. Output depends on the specific LEDs, optics, thermal design and measured photometry. A longer housing may provide room for more optical modules, but length alone cannot establish lumen output, beam distance or road-use legality.
| Nominal size | Common fitment role | Measure carefully for | Practical trade-off |
|---|---|---|---|
| 20 inch | Narrow bumper openings, compact builds or a lower auxiliary position | Side bracket room and grille depth | Easier to package; usually covers less horizontal width than a longer bar of the same optical family |
| 30 inch | Mid-width bumper or grille locations | Center supports, winch hardware and sensor clearance | A middle option when a 20 inch bar leaves unused span but a 40 inch bar cannot clear the structure |
| 40 inch | Wider bumper openings or a designed roof/crossbar mount | Windshield, roof-rack, hood and bracket clearance | Wider packaging and greater exposed area; mounting height and local rules matter |
These are general placement patterns, not vehicle-fitment claims. Confirm actual body and bracket dimensions for the exact product and vehicle. To compare lighting performance, use measured photometric data rather than the size printed in a product title. Our light bars versus driving lights guide and LED headlight troubleshooting article cover beam roles and electrical symptoms.
For a product-specific comparison, review the published dimensions and mounting instructions for the Jungle 20 inch and Jungle 40 inch bars. Both exact product names and pages are listed in the LED light bar catalog; verify full dimensions and wiring details before purchase.
What else should you check before ordering?
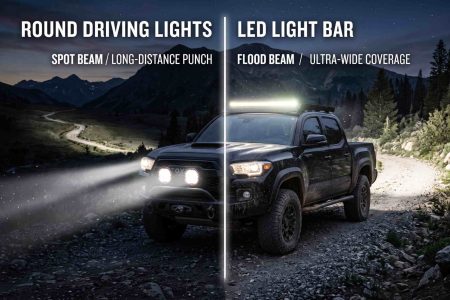
Fitment is only one part of the decision. Match the beam pattern and mounting position to where you drive. A wide bar mounted high may illuminate the sides of a trail but can also reflect from the hood or windshield; a low bumper mount can avoid some hood reflection while leaving near-field shadows. Our existing light bars versus driving lights guide covers beam roles and mounting trade-offs in more detail.

Before ordering, check:
- Vehicle equipment: active grille shutters, parking sensors, cameras, adaptive cruise radar, winch fairleads and recovery points must remain unobstructed.
- Mounting instructions: use the bar’s supplied brackets and approved fasteners; follow the bumper or rack maker’s load limits.
- Electrical requirements: confirm the product’s input-voltage range, current draw, connector and included harness. Do not size a circuit from nominal bar length.
- Operating purpose: choose a pattern that supports your intended terrain and speed. More light is not always better if it creates glare or poor contrast.
- Local road rules: auxiliary lamp rules differ by jurisdiction. Do not assume that a DOT-marked product or a fitment kit makes every installation legal for public-road use.
If the vehicle is still under warranty or the installation touches safety-related systems, check the vehicle maker’s instructions or ask a qualified installer before drilling, splicing wiring or moving sensors.
A quick fitment checklist
| Check | Pass condition |
|---|---|
| Mounting span | Bracket-to-bracket width fits the rigid supports |
| Body clearance | Housing, end caps and fasteners clear trim and painted surfaces |
| Rear space | Heat sink, plug and cable bend clear shutters and other equipment |
| Optical use | Beam pattern and height match the intended driving environment |
| Electrical data | Voltage, current and connector match the vehicle and harness instructions |
| Compliance | Installation and use follow the relevant local requirements |
For a 20 vs 30 vs 40 inch light bar decision, choose only after the full housing and bracket dimensions pass those checks. If the fitment drawing is missing, pause and ask the seller or manufacturer for it rather than relying on the nominal size.
Sources
- SAEC LED light bar catalog — product options and nominal sizes.
- SAEC LED light manual — use the product-specific installation instructions for the selected model.
Image rights: All three images are original AI-generated editorial illustrations created for this guide; they are generic and do not depict a verified vehicle installation or SAEC product.
 by